
1. Introduction.
Cool Tabs allows you to create a Memory Cards game, in which participants will have to flip the cards to find matching pairs before the time runs out.
You can customize the game by uploading your own images for the cards, and the background image, as well as assigning points for finding a pair or for completing the game in the shortest time possible. In addition, these types of campaigns are also designed to attract leads, which is why they include a personal information form, which is also customizable.
A Memory Card campaign is a perfect tool to gamify your content in online channels, such as social networks, and reward your audience with sweepstakes among participants, those who complete the game, or those who are faster and capture data.
2. Step by Step.
2.1. Create your campaign.
First, you must create your campaign and configure the basic setting. Is it your first time creating a campaign with Cool Tabs? In the following tutorial, we will show you how to configure the basic sections of a campaign, as well as other recommended settings, to ensure its proper functioning and maximize results.
How to get started on creating a campaign: basic settings.
If you have any questions during the process, you can contact us at help@cool-tabs.com.
2.2. Configure the Memory Cards.
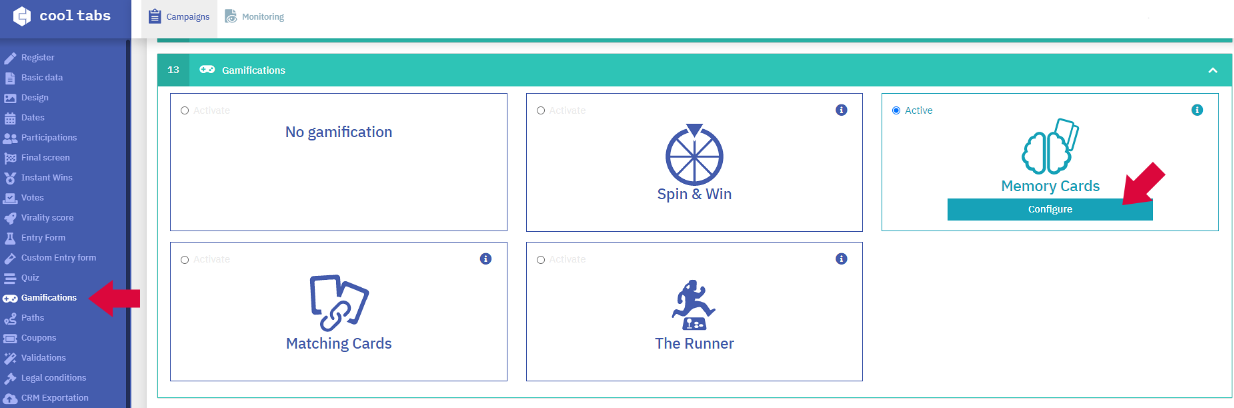
After completing the basic sections, go to the 'Gamifications' section, activate the Memory Cards option, and click on 'Configure'.
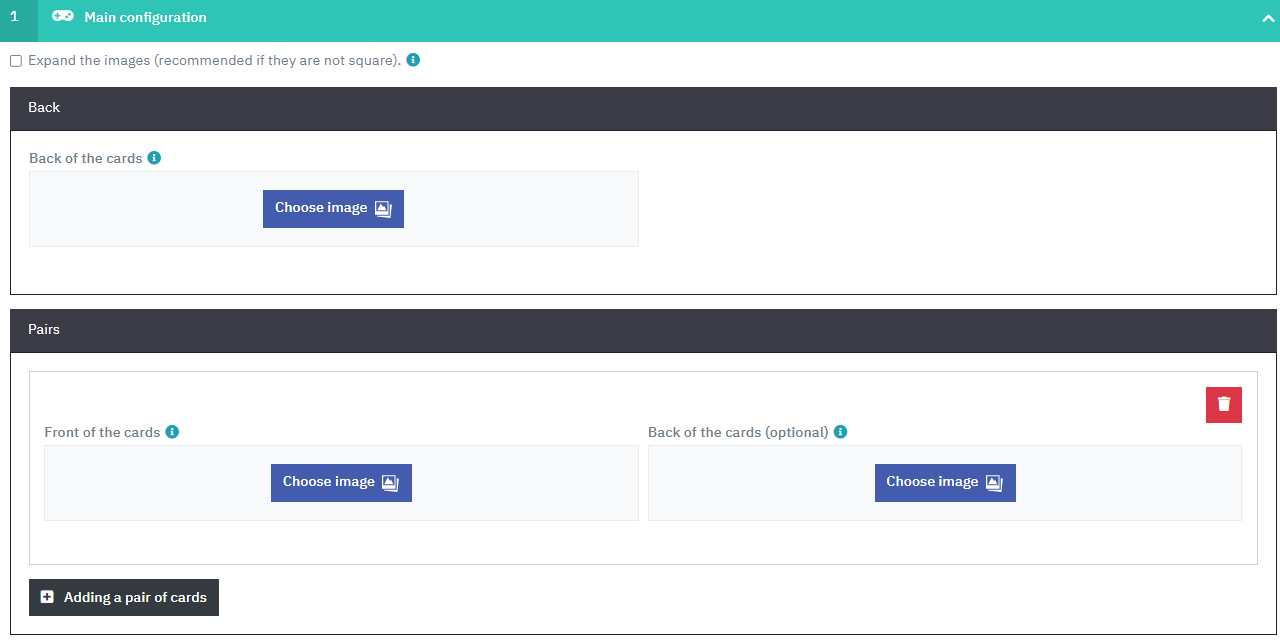
2.2.1. Main configuration.
You will have to set up the cards.
- Back of the cards. You can include an image for all the backs of the cards. If you leave this blank, we will include one by default.
- Add a pair of cards. You can add as many pairs as you need.
- Front of the cards. This is the image that will appear once the card is turned over.
- Back of the cards (optional). When the card is hidden, this image will appear. This field is optional since you will only have to add it if you want a different back for each card.
The recommended dimensions for Images are 240 x 240px.
If you upload another size, we will automatically resize it to a maximum width/height of 240px.
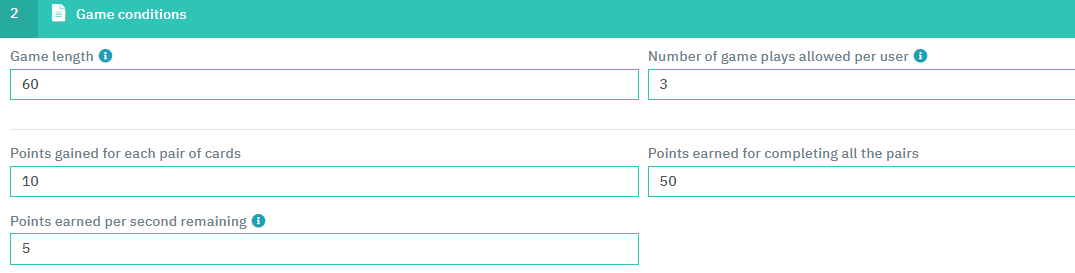
2.2.2. Game conditions.
You must set up the different fields, related to game scoring:
- Duration. You can define a time limit (in seconds) that users will have to play.
- Points per pair. This is the number of points the user will obtain for correctly guessing a pair of cards.
- Points for completion. These are the points that the user will obtain for completing all the pairs.
- Points per second. Points per remaining seconds that the user will earn upon completing the game.
- The number of games allowed per user. Specifies how many times a user can play. Each time he/she plays again, the cards will be shuffled randomly. When the game is over, a popup will be shown with the points obtained, the text “You have X more chances” and the button “Play again”. Once you reach the limit of allowed games, you will not be given the option to play again, only to continue.
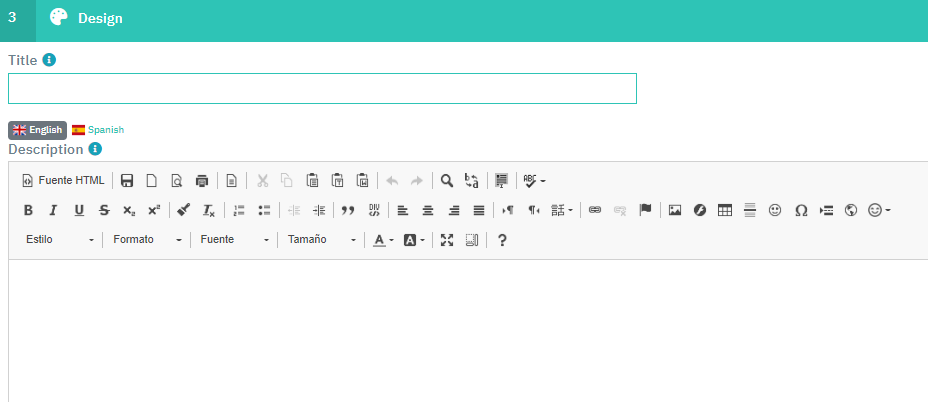
2.2.3. Design.
Finally, set up aspects related to the game's appearance.
- Title. This is the title that will appear as the header in the game.
- Description. You can use this field to display content (text and/or image) to the participants.
Once done, save your Memory Card's settings in order to continue with the rest of the campaign.
Below, you can see an example of how the game screen of a Memory Card is displayed.
2.3. Other settings.
2.3.1. Ranking of participants.
In gamification campaigns, where players score points, it is common to show the public list of participants. In this way, the participations are made public so that all participants know where they ranked.
If you want to show the ranking of players, with the points they have obtained, activate the list of participants.
To enable the public ranking of participants, follow the steps in the tutorial on How to display a public entries list or ranking of participants.
2.3.2. Winner selection.
If your game is linked to sweepstakes. Once the participation period is over, you will be able to select winners.
You will be able to choose them randomly, filtering by different conditions, for example, by the points obtained in the game.
The list of participants will show the data of the participants, as well as the total points they have obtained.
To start the selection, you can follow the tutorial: How to select winners and obtain your Certificate of Validity.
3. Other Specifications.
The Cool Promo and Cool Promo White Label applications, included in the Gold and Diamond plans, respectively, are the ones that allow you to set up a memory card game.
You can also create your game with the 7-day free trial, which allows you to test any of our plans.
If you have any questions during the process, don't hesitate to contact us through the chat on our website or our support email at help@cool-tabs.com.
4. Content Related.
How to access the URL of your campaign to publish it.
How to create a Matching Cards game.
How to create a Spot the Differences game.
Comments
0 comments
Please sign in to leave a comment.